
Bounce Back
| Bounce Back | |
|---|---|
 | |
| Class | Medication |
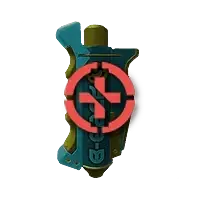
Bounce Back is a Health Item that keeps V alive in a fight. It heals a small amount at once and then keeps healing V for several seconds. That suits a character who can step out of the line of fire for a moment and let the healing run. Like every Health Item, it sits in its own slot and recharges over time instead of running out. The Technical Ability perk tree holds most of the perks that add charges and speed up that recharge. Bounce Back is a Health Item that meds vendors across Night City sell, together with the crafting specs for its higher tiers.
Effect
Bounce Back is an injector. When V uses it, a small part of V's Health returns at once. The injector then regenerates more Health every second for a short time. Over its full duration, the total healing can exceed what a MaxDoc restores at once.
MaxDoc is the other Health Item, and it works the other way round. MaxDoc restores a large amount of Health in one go. Bounce Back trades that instant burst for steady healing over time.
Health Items recharge instead of running out. V equips one Health Item, and it holds a set number of charges. Without perks, V has two charges. Each use spends a charge and puts the item on cooldown. Spent charges refill over time, and V can still use the second charge while the first one recharges.
How to Get Bounce Back Guide
- Buy a higher tier of Bounce Back from a meds vendor.
- Buy its crafting spec from a meds vendor and craft it with crafting components.
Bounce Back Map Location
The map shows Yin & Yang Pharmacy in Little China, one of the meds vendors that sell it.
Bounce Back map location:
Map credit by Map Genie.
Upgrades
Bounce Back comes in several tiers, and each higher tier heals more. V only needs to obtain a higher tier once. The equipped Bounce Back then upgrades for good. Meds vendors sell the higher tiers and their crafting specs. Any character can craft a tier with its crafting spec and the matching crafting components.
Character Builds
Bounce Back belongs above all in a Technical Ability build, since that tree holds most of the perks for Health Items. Health Freak speeds up Health Item recharge. Its second level adds one more charge and much faster recharge outside combat. Glutton For War gives a small instant recharge after V neutralizes an enemy. First Aid speeds up the recharge while only one charge has been used. Transfusion makes the final charge heal more. Field Medic makes V use Health Items faster in combat. Borrowed Time fully recharges a Health Item after a kill when V is below a quarter of Health and out of charges. Pyromania also speeds up the recharge at its first level.
Body perks add to the effect as well. Dorph-Head gives a short burst of damage mitigation whenever V uses a Health Item. Adrenaline Rush lets Health Items grant Adrenaline, a yellow bar that absorbs damage like extra Health. Pain To Gain speeds up Health Item recharge after a kill while Adrenaline Rush is active.
Cyberware helps too. The Biomonitor uses the equipped Health Item on its own when V's Health drops below half. The Cellular Adapter speeds up Health Item recharge for each point of Technical Ability. The Blood Pump is a Circulatory System implant that works as a powerful Health Item of its own, so it gives V a second source of healing.
Select a Build
The character fights at close range with shotguns and uses Health items often to keep Adrenaline Rush going. Every Health item adds a layer of Adrenaline that soaks up damage. Kills during Adrenaline Rush recharge the Health items, so the next heal comes back sooner.
Attributes: Body 20, Reflexes 20, Technical Ability 20, Intelligence 3, Cool 18.
The perks, cyberware and weapon mods for this build are listed below.
| Name | Image | Level | Effect |
|---|---|---|---|
| Painkiller | 
|
Body 4 | Slow Health regeneration in combat |
| Adrenaline Rush | 
|
Body 15 | Health items and Blood Pump give Adrenaline that absorbs damage |
| Spontaneous Obliteration | 
|
Body 15 | Chance to instantly kill enemies at low Health |
| Calm Mind | 
|
Body 15 | Adrenaline lasts longer before it decays |
| Juggernaut | 
|
Body 15 | More speed and damage during Adrenaline Rush |
| Bloodlust | 
|
Body 15 | Dismemberments refill Adrenaline |
| Pain To Gain | 
|
Body 20 | Kills recharge Health items during Adrenaline Rush |
Consumable Categories
All Medication
Every medication consumable is listed below.
| Name | Image | Effect | Duration | Price |
|---|---|---|---|---|
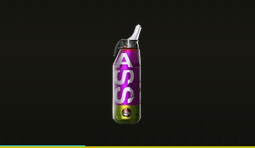
| AssKick | 
|
+20% Max Health. −50% Stamina Regen Rate | 1800 | |
| Bounce Back | 
|
|||
| Capacity Booster | 
|
+50% Carrying Capacity | 1800 | |
| Health Booster | 
|
+10% Max Health | 1800 | |
| Jellytricity | 
|
+20% Stamina Regen Rate. −15% Max Health | 1800 | |
| MaxDoc | 
|
|||
| Ol' Donkey | 
|
+100 Carrying Capacity. −20% Stamina Regen Rate | 1800 | |
| Oxy Booster | 
|
Allows you to breathe under water. | 1800 | €$ 750 |
| RAM Jolt | 
|
+2 Max RAM | 1800 | |
| RAM Nugs | 
|
+4 RAM unit(s) −20% Max Health | 1800 | |
| Stamina Booster | 
|
1800 |