
Cyberware
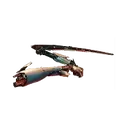
Cyberware is technology installed permanently into the body. Implants raise damage, slow time, add Armor, refill Health or unlock quickhacks. They are also the main source of Armor in the game. Ripperdocs sell and install them, and only a ripperdoc can swap one implant for another. A build is chromed slot by slot. The operating system sets the active power, and the other slots add passive bonuses around it. Cyberware Capacity limits how much of it a single body can carry.
Capacity
Every implant has a capacity cost. The total of all installed implants cannot go over Cyberware Capacity. A cheap implant such as the Basic Kiroshi Optics costs 1 point. A heavy Iconic implant such as the COX-2 Cybersomatic Optimizer costs about 50. Capacity therefore decides how many strong implants a build can run at once.
Capacity grows in several ways. The table lists them.
| Source | Amount |
|---|---|
| Starting value | 24 |
| Level ups | About 3 per level, up to 201 at level 60 |
| Cyberware Capacity Shards | A few points per shard |
| Engineer skill | +5 at level 10, +10 at level 30 |
| Renaissance Punk perk | +4 for each attribute at 9 or higher |
| Edgerunner perk | Up to 50 over the limit, at a Health cost |
| Chrome Compressor | Up to +70, in place of an operating system |
Cyberware Capacity Shards are permanent. Enemies drop them at random, and a few hide in caches.
Going over the limit needs the Edgerunner perk. It opens at 20 Technical Ability, after License To Chrome. Each point over capacity costs 0.5% of max Health. In return, each kill during combat has a small chance to start a Fury. The chance rises with every point over capacity. A Fury adds 10% damage, 30% Crit Chance and 50% Crit Damage for 12 seconds.
All Things Cyber lowers the cost of Skeleton and Integumentary System implants by 20%. It adds no capacity, but it frees room in the same way.
Cyberware Categories
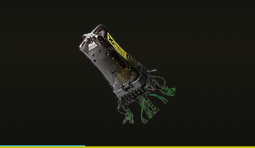
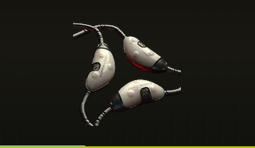
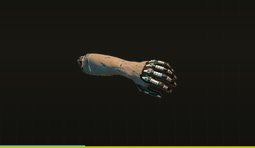
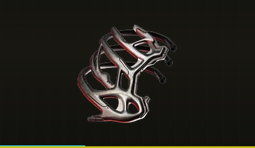
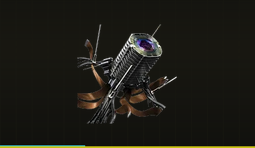
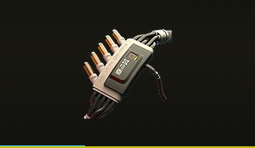
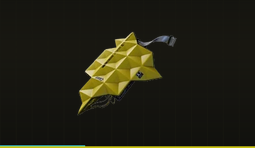
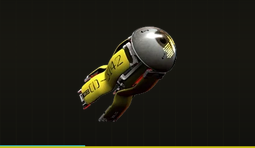
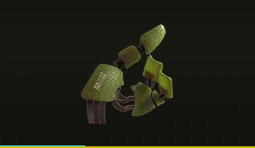
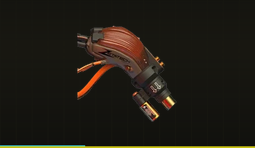
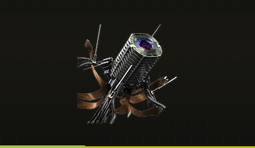
Best Cyberware
The strongest implants of every class, taken from the Best table of each class page.
| Name | Image | Class | Why |
|---|---|---|---|
| Militech Apogee Sandevistan | 
|
Operating System | 85% time slow, the deepest of any Sandevistan |
| Militech Falcon Sandevistan | 
|
Operating System | Heals on every kill while time is slowed |
| COX-2 Cybersomatic Optimizer | 
|
Frontal Cortex | Sure quickhack crits at Tier 5 |
| Axolotl | 
|
Frontal Cortex | Large cooldown cut on every kill |
| Mantis Blades | 
|
Arms | Leap Attack and the full blade perk line |
| MaxTac Mantis Blades | 
|
Arms | Heals on killing a bleeding enemy |
| Rara Avis | 
|
Skeleton | Up to 42% more total Armor |
| Epimorphic Skeleton | 
|
Skeleton | Up to 13% more max Health |
| Deep-Field Visual Interface | 
|
Nervous System | Crit Chance scaling out to 100 meters |
| Revulsor | 
|
Nervous System | Free time slow at low Health |
| Second Heart | 
|
Circulatory System | Full Health when Health hits zero |
| Blood Pump | 
|
Circulatory System | Burst heal plus healing over time |
| Chitin | 
|
Integumentary System | Large Armor and faster Health Regen |
| Peripheral Inverse | 
|
Integumentary System | Up to 45% less damage at point-blank range |
| Kiroshi Cockatrice Optics | 
|
Face | Up to 35% Crit Chance on every attack |
| Kiroshi The Oracle Optics | 
|
Face | Enemies, cameras and traps in one scan |
| Immovable Force | 
|
Hands | Less recoil and spread, cover bonuses anywhere |
| Smart Link | 
|
Hands | Lock-on for Smart weapons plus Max RAM |
| Reinforced Tendons | 
|
Legs | Double jump for combat and travel |
| Leeroy Ligament System | 
|
Legs | Up to 20% movement speed at all times |
Ripperdocs
Ripperdocs are the clinics where cyberware is bought, installed and upgraded. Every ripperdoc shares the same stock. That stock depends on the player's level. It refreshes every 10 levels, not every day.
Each implant comes in tiers. Tier 1 is on sale from level 1, Tier 2 from level 10, Tier 3 from level 20, Tier 4 from level 30 and Tier 5 from level 40. An installed implant can be upgraded at a ripperdoc with item components of the next tier. That is the only way to reach Tier 5+ and Tier 5++.
Implants also carry stat bonuses on top of their main effect. A Tier 1 implant has one bonus, and Tier 2 adds a second. The Driver Update perk adds a third bonus to every implant. Chipware Connoisseur lets the player choose between sets of bonuses when upgrading. From Tier 3, it offers two new sets alongside the current one.
| Ripperdoc | District | Region |
|---|---|---|
| Viktor Vektor | Little China | Watson |
| Robert Rainwater | Kabuki | Watson |
| Charles Bucks | Kabuki | Watson |
| Sogo Watanabe | Kabuki | Watson |
| Cassius Ryder | Northside | Watson |
| Finn Gerstatt | Japantown | Westbrook |
| Chiyo Omoto | Japantown | Westbrook |
| Darius Clarke | Downtown | City Center |
| Santiago Molina | Wellsprings | Heywood |
| Rafael Pérez | Arroyo | Santo Domingo |
| Octavio Delgado | Rancho Coronado | Santo Domingo |
| Rony LaFleur | West Wind Estate | Pacifica |
| Eron Acedo | Dogtown | Pacifica |
| Costin Lahovary | Dogtown | Pacifica |
| Hutch Spindler | Aldecaldo camp | Badlands |
The Dogtown ripperdocs need Phantom Liberty. They sell most of the Iconic cyberware.
Attributes and Slots
The body has ten cyberware slots. Each slot holds its own kind of implant.
| Slot | Places | Main Attributes | Implants |
|---|---|---|---|
| Frontal Cortex | 3 | Intelligence | RAM, quickhack crits, cooldown cuts |
| Operating System | 1 | Reflexes, Body, Intelligence | Sandevistans, Berserks, cyberdecks |
| Arms | 1 | Every attribute, by variant | Blades, Gorilla Arms, Monowire, launcher |
| Skeleton | 2, or 3 with License To Chrome | Body, Technical Ability | Armor, Health, Mitigation |
| Nervous System | 3 | Cool, Reflexes | Time slows, speed, Crit Chance |
| Circulatory System | 3 | Technical Ability, Reflexes | Healing, Stamina |
| Integumentary System | 3 | Every attribute | Armor and damage cuts |
| Face | 1, or 2 after Birds with Broken Wings | Every attribute | Kiroshi optics, the Faceplate |
| Hands | 1, or 2 with Ambidextrous | Intelligence, Cool, Technical Ability | Ricochets, Smart Link, recoil |
| Legs | 1 | Body, Reflexes, Cool | Jumps, speed, quiet steps |
Every implant is attuned to one attribute. Each point in that attribute adds a small bonus through the implant. Technical Ability often adds half a point of Armor per point, and Cool adds 0.2% headshot and weakspot damage. Reflexes adds a little Crit Chance, and Body adds Health. The attribute of a build therefore points to its implants. Filling all ten slot types unlocks the achievement Full Body Conversion. The Cyborg perk cuts every cyberware cooldown by 15% once all available slots are filled.
Operating Systems
The operating system is the one implant that shapes a build the most. It takes a single slot, and three families compete for it.
- Sandevistan. It slows time for everyone except its user. Every Sandevistan is attuned to Reflexes. The Militech Apogee slows time by 85%, and it is the best Sandevistan in the game. The Militech Falcon heals on each kill. Both can start at any charge level.
- Berserk. It cuts incoming damage and keeps Health above a quarter, but locks its user to melee weapons. Each kill during the window restores a quarter of max Health when it ends. The Militech Berserk makes its user fully invulnerable instead.
- Cyberdeck. It unlocks quickhacks and sets the RAM pool, the quickhack slots and the buffer. Each deck adds bonuses for one style of netrunning. The Raven Microcyber spreads quickhacks, and the Militech Canto carries Blackwall Gateway.
The Chrome Compressor stands apart. It gives up the active power for extra capacity. Ticking Time Bomb sets off an EMP whenever a Sandevistan or Berserk starts, and Extended Warranty makes every cyberware effect last 15% longer.
Character Builds
- Reflexes blade fighter. Mantis Blades or a Sandevistan lead. Microrotors, the Adrenaline Booster and Stabber keep the blades swinging and landing crits.
- Body brawler. Gorilla Arms and a Berserk lead. ProxiShield, the Epimorphic Skeleton and Chitin keep the brawler standing.
- Cool marksman. Visual Cortex Support or the Deep-Field Visual Interface raise Crit Chance with distance. The Kiroshi Cockatrice Optics and the Tyrosine Injector add more damage.
- Stealth. Optical Camo, Lynx Paws and Atomic Sensors keep the character hidden. The Basic Kiroshi Optics slow down cameras.
- Intelligence netrunner. A cyberdeck leads. The COX-2 or the Bioconductor adds quickhack crits, and the RAM Reallocator or the Camillo RAM Manager refills RAM.
- Smart weapons. Smart Link is required, and it adds Max RAM for hybrid netrunners.
- Technical Ability tank. Para Bellum, Bionic Joints and Subdermal Armor stack Armor. The Blood Pump and the Biomonitor keep Health up, and the Feedback Circuit heals on charged Tech shots.
The Newton Module and Axolotl help every build with active cyberware, because each kill cuts all cooldowns. Second Heart is a late game safety net that suits any of them.
Subcategories
This category has the following 44 subcategories, out of 44 total.
C
- Cyberpunk 2077
- Cyberpunk 2077 - Arms
- Cyberpunk 2077 - Assault Rifles
- Cyberpunk 2077 - Cars
- Cyberpunk 2077 - Circulatory System
- Cyberpunk 2077 - Combat
- Cyberpunk 2077 - Consumables
- Cyberpunk 2077 - Control
- Cyberpunk 2077 - Covert
- Cyberpunk 2077 - Cyberware
- Cyberpunk 2077 - Drinks
- Cyberpunk 2077 - Drugs
- Cyberpunk 2077 - Face
- Cyberpunk 2077 - Food
- Cyberpunk 2077 - Frontal Cortex
- Cyberpunk 2077 - Grenades
- Cyberpunk 2077 - Hands
- Cyberpunk 2077 - Iconic Cyberware
- Cyberpunk 2077 - Iconic Weapons
- Cyberpunk 2077 - Integumentary System
- Cyberpunk 2077 - Legs
- Cyberpunk 2077 - Machine Guns
- Cyberpunk 2077 - Medication
- Cyberpunk 2077 - Melee Weapons
- Cyberpunk 2077 - Mods
- Cyberpunk 2077 - Motorcycles
- Cyberpunk 2077 - Muzzles
- Cyberpunk 2077 - Nervous System
- Cyberpunk 2077 - Operating System
- Cyberpunk 2077 - Pistols
- Cyberpunk 2077 - Precision Rifles
- Cyberpunk 2077 - Quickhacks
- Cyberpunk 2077 - Revolvers
- Cyberpunk 2077 - Scopes
- Cyberpunk 2077 - Shotguns
- Cyberpunk 2077 - Skeleton
- Cyberpunk 2077 - SMGs
- Cyberpunk 2077 - Sniper Rifles
- Cyberpunk 2077 - Trucks
- Cyberpunk 2077 - Ultimate
- Cyberpunk 2077 - Vehicle
- Cyberpunk 2077 - Vehicles
- Cyberpunk 2077 - Weapon Mods
- Cyberpunk 2077 - Weapons
Pages in category "Cyberware"
The following 200 pages are in this category, out of 520 total.
(previous page) (next page)A
- Cyberpunk2077:A-22B Chao
- Cyberpunk2077:Achilles x-MOD2
- Cyberpunk2077:Add-Vantage
- Cyberpunk2077:Adrenaline Booster
- Cyberpunk2077:Adrenaline Converter
- Cyberpunk2077:Adreno-Trigger
- Cyberpunk2077:Agaou
- Cyberpunk2077:Airstrike
- Cyberpunk2077:Alabai
- Cyberpunk2077:Ambition
- Cyberpunk2077:Amnesty
- Cyberpunk2077:Amstaff
- Cyberpunk2077:Apparition
- Cyberpunk2077:AR Raygun Supreme 9000
- Cyberpunk2077:Arasaka Shadow
- Cyberpunk2077:ARCH Nazaré
- Cyberpunk2077:ARCH Nazaré "Itsumade"
- Cyberpunk2077:ARCH Nazaré "Kobold"
- Cyberpunk2077:ARCH Nazaré "Racer"
- Cyberpunk2077:Archangel
- Cyberpunk2077:Archer Hella EC-D i360
- Cyberpunk2077:Archer Quartz "Bandit"
- Cyberpunk2077:Archer Quartz "Sidewinder"
- Cyberpunk2077:Archer Quartz "Specter"
- Cyberpunk2077:Archer Quartz EC-L r275
- Cyberpunk2077:Archer Quartz EC-T2 r660
- Cyberpunk2077:Ashura
- Cyberpunk2077:AssKick
- Cyberpunk2077:Atomic Sensors
- Cyberpunk2077:Axolotl
B
- Cyberpunk2077:Ba Xing Chong
- Cyberpunk2077:Baby Boomer
- Cyberpunk2077:Bait
- Cyberpunk2077:Bald Eagle
- Cyberpunk2077:Ballistic Coprocessor
- Cyberpunk2077:Barbarian
- Cyberpunk2077:Baseball Bat
- Cyberpunk2077:Baseball Bat x-MOD2
- Cyberpunk2077:Basic Kiroshi Optics
- Cyberpunk2077:Behavioral Imprint-Synced Faceplate
- Cyberpunk2077:Better Half
- Cyberpunk2077:BFC 9000
- Cyberpunk2077:Big Mag
- Cyberpunk2077:Bioconductor
- Cyberpunk2077:BioDyne Berserk
- Cyberpunk2077:Biomonitor
- Cyberpunk2077:Bionic Joints
- Cyberpunk2077:Biotech Σ
- Cyberpunk2077:Black Lace
- Cyberpunk2077:Black Mamba
- Cyberpunk2077:Black Unicorn
- Cyberpunk2077:Blackwall Gateway
- Cyberpunk2077:Bleedout
- Cyberpunk2077:Blood Pump
- Cyberpunk2077:Bloodbruiser
- Cyberpunk2077:Bloody Maria
- Cyberpunk2077:Blue Fang
- Cyberpunk2077:Boomerang
- Cyberpunk2077:Borzaya
- Cyberpunk2077:Bounce Back
- Cyberpunk2077:Breakthrough
- Cyberpunk2077:Brennan Apollo
- Cyberpunk2077:Brennan Apollo 650-S
- Cyberpunk2077:Butcher's Cleaver
- Cyberpunk2077:Buzzsaw
- Cyberpunk2077:Byakko
C
- Cyberpunk2077:C-Thru
- Cyberpunk2077:Camillo RAM Manager
- Cyberpunk2077:Capacity Booster
- Cyberpunk2077:Carapace
- Cyberpunk2077:Caretaker's Spade
- Cyberpunk2077:Carmen
- Cyberpunk2077:Carnage
- Cyberpunk2077:Cat Food
- Cyberpunk2077:Catahoula
- Cyberpunk2077:Cellular Adapter
- Cyberpunk2077:Chaos
- Cyberpunk2077:CHAR Incendiary Grenade
- Cyberpunk2077:Cheetah
- Cyberpunk2077:Chef's Knife
- Cyberpunk2077:Chesapeake
- Cyberpunk2077:Chevillon Emperor 620 Ragnar
- Cyberpunk2077:Chevillon Legatus 450 Aquila
- Cyberpunk2077:Chevillon Thrax 388 Jefferson
- Cyberpunk2077:Chinook
- Cyberpunk2077:Chitin
- Cyberpunk2077:Chrome Compressor
- Cyberpunk2077:Claw
- Cyberpunk2077:Claw x-MOD2
- Cyberpunk2077:ClearVue Mk.8
- Cyberpunk2077:Clutch Padding
- Cyberpunk2077:Cocktail Stick
- Cyberpunk2077:Cogito Lattice
- Cyberpunk2077:Comrade Kolya's Premium Black Caviar
- Cyberpunk2077:Comrade's Hammer
- Cyberpunk2077:Condenser
- Cyberpunk2077:Contagion
- Cyberpunk2077:Corpo Plaza Apartment
- Cyberpunk2077:Cortes Delamain No. 21
- Cyberpunk2077:Cottonmouth
- Cyberpunk2077:Countershell
- Cyberpunk2077:COX-2 Cybersomatic Optimizer
- Cyberpunk2077:CQO Kanone MINI Mk.72
- Cyberpunk2077:Crafting Specs
- Cyberpunk2077:Crash
- Cyberpunk2077:Crimestopper
- Cyberpunk2077:Cripple Movement
- Cyberpunk2077:Critochet
- Cyberpunk2077:Crowbar
- Cyberpunk2077:Crusher
- Cyberpunk2077:CS-1 Taipan
- Cyberpunk2077:Cut-O-Matic
- Cyberpunk2077:Cut-o-Matic x-MOD2
- Cyberpunk2077:Cyberpsychosis
- Template:Cyberpunk2077Categories
- Cyberpunk2077:Cyberware Malfunction
- Cyberpunk2077:Cyclone
D
- Cyberpunk2077:D5 Copperhead
- Cyberpunk2077:D5 Sidewinder
- Cyberpunk2077:DA8 Umbra
- Cyberpunk2077:DB-2 Satara
- Cyberpunk2077:DB-2 Testera
- Cyberpunk2077:DB-4 Igla
- Cyberpunk2077:DB-4 Palica
- Cyberpunk2077:Death and Taxes
- Cyberpunk2077:Deep-Field Visual Interface
- Cyberpunk2077:Defenzikov
- Cyberpunk2077:Dendritic Protoplasma Supplier
- Cyberpunk2077:Dense Marrow
- Cyberpunk2077:Detonate Grenade
- Cyberpunk2077:Dezerter
- Cyberpunk2077:Divided We Stand
- Cyberpunk2077:Doom Doom
- Cyberpunk2077:DR-12 Quasar
- Cyberpunk2077:DR-5 Nova
- Cyberpunk2077:DS1 Pulsar
- Cyberpunk2077:Dying Night
- Cyberpunk2077:Dynalar Sandevistan
E
- Cyberpunk2077:E255 Percipient
- Cyberpunk2077:E305 Prospecta
- Cyberpunk2077:Electric Baton Alpha
- Cyberpunk2077:Electric Baton Beta
- Cyberpunk2077:Electric Baton Gamma
- Cyberpunk2077:Electrifying Gorilla Arms
- Cyberpunk2077:Electrifying Mantis Blades
- Cyberpunk2077:Electrifying Monowire
- Cyberpunk2077:Electrifying Projectile Launch System
- Cyberpunk2077:Electromag Recycler
- Cyberpunk2077:Emergency Brake
- Cyberpunk2077:EMP Grenade
- Cyberpunk2077:Epimorphic Skeleton
- Cyberpunk2077:Equalizer
- Cyberpunk2077:Erebus
- Cyberpunk2077:Errata
- Cyberpunk2077:Eurodollar
- Cyberpunk2077:Ex-Disk
F
G
- Cyberpunk2077:G-58 Dian
- Cyberpunk2077:Gaki
- Cyberpunk2077:Gambiteer
- Cyberpunk2077:GASH Antipersonnel Grenade
- Cyberpunk2077:Genjiroh
- Cyberpunk2077:Glen Apartment
- Cyberpunk2077:Gold-Plated Baseball Bat
- Cyberpunk2077:Gorilla Arms
- Cyberpunk2077:Gris-Gris
- Cyberpunk2077:Guillotine
- Cyberpunk2077:Guillotine x-MOD2
- Cyberpunk2077:Guts
- Cyberpunk2077:Gwynbleidd
H
- Cyberpunk2077:HA-4 Grit
- Cyberpunk2077:HA-7 Warden
- Cyberpunk2077:Hackatomy
- Cyberpunk2077:Haemocide
- Cyberpunk2077:Hammer
- Cyberpunk2077:Handle Wrap
- Cyberpunk2077:Handyman
- Cyberpunk2077:Hawk
- Cyberpunk2077:Headhopper
- Cyberpunk2077:Headhunter
- Cyberpunk2077:Headtoll
- Cyberpunk2077:Heal-On-Kill
- Cyberpunk2077:Health Booster
- Cyberpunk2077:Her Majesty
- Cyberpunk2077:Hercules 3AX
- Cyberpunk2077:Herrera Outlaw GTS
- Cyberpunk2077:Herrera Riptide "Terrier"
- Cyberpunk2077:HJKE-11 Yukimura
- Cyberpunk2077:HJSH-18 Masamune
- Cyberpunk2077:HPO Kanone MAX Mk.77