
Envoy's Long Horn
| Envoy's Long Horn | |
|---|---|
 | |
| Attack | 120 Physical, 78 Holy |
| Critical | 100 |
| Scaling | Str D, Dex D, Fai C |
| Requires | Str 23, Dex 11, Fai 18 |
| Effect | |
| Guard | 58% physical, 39 guard boost |
| Type | Great Hammer |
| Attack Type | Strike |
| Skill | Bubble Shower |
| FP Cost | 12 |
| Weight | 9.5 |
| Upgrades With | Somber Smithing Stones, to +10 |
| Sell Price | 100 |
Envoy's Long Horn is a Great Hammer in Elden Ring. It is a late-game find.
The Envoy's Long Horn is the long golden horn of the Oracle Envoys, an instrument that cannot be sounded by a mere human, so it is used to bludgeon foes instead. It drops from the large Oracle Envoys near the East Capital Rampart in Leyndell, Royal Capital, and from the same enemies in Miquella's Haligtree. Despite being a horn it has long reach for its class and deals holy damage alongside physical. Its unique skill, Bubble Shower, blows a spume of magic bubbles that float gently before raining down on the target, effective against large bosses and groups. It suits a Strength and Faith character.
How to Get Envoy's Long Horn Guide
4% chance to be dropped by large Oracle Envoys.
Where to find Envoy's Long Horn Location?
Envoy's Long Horn map location:
Map credit by Map Genie.
Upgrades
Reinforcing it calls for Somber Smithing Stones, up to +10.
| Level | Material | Amount | Attack | Scaling |
|---|---|---|---|---|
| +1 |  Somber Smithing Stone [1] Somber Smithing Stone [1] |
x1 | 137 Physical, 89 Holy | Str D, Dex D, Fai C |
| +2 |  Somber Smithing Stone [2] Somber Smithing Stone [2] |
x1 | 154 Physical, 100 Holy | Str D, Dex D, Fai C |
| +3 |  Somber Smithing Stone [3] Somber Smithing Stone [3] |
x1 | 172 Physical, 111 Holy | Str D, Dex D, Fai C |
| +4 |  Somber Smithing Stone [4] Somber Smithing Stone [4] |
x1 | 189 Physical, 123 Holy | Str D, Dex D, Fai C |
| +5 |  Somber Smithing Stone [5] Somber Smithing Stone [5] |
x1 | 207 Physical, 134 Holy | Str D, Dex D, Fai C |
| +6 |  Somber Smithing Stone [6] Somber Smithing Stone [6] |
x1 | 224 Physical, 145 Holy | Str D, Dex D, Fai C |
| +7 |  Somber Smithing Stone [7] Somber Smithing Stone [7] |
x1 | 241 Physical, 157 Holy | Str D, Dex D, Fai B |
| +8 |  Somber Smithing Stone [8] Somber Smithing Stone [8] |
x1 | 259 Physical, 168 Holy | Str C, Dex D, Fai B |
| +9 |  Somber Smithing Stone [9] Somber Smithing Stone [9] |
x1 | 276 Physical, 179 Holy | Str C, Dex D, Fai B |
| +10 |  Somber Ancient Dragon Smithing Stone Somber Ancient Dragon Smithing Stone |
x1 | 294 Physical, 191 Holy | Str C, Dex D, Fai B |
Skill
Bubble Shower costs 12 FP. The wielder kneels and blows the horn, releasing a spume of golden bubbles that drift through the air and then rain down on the target. The bubbles deal holy damage and hit many times over a wide area, and the Envoy Crown boosts their damage. No other weapon carries this skill, and it cannot be replaced.
Suggested Build
Swing it for long-reaching holy blows and use Bubble Shower against large bosses or groups.
| Stats | Strength 60, Faith 40, Vigor 50, Endurance 28, Mind 20, Dexterity 15 (23 Strength and 18 Faith to wield it) |
|---|---|
| Affinity | Cannot be infused; it keeps its own scaling. |
| Talismans | Sacred Scorpion Charm, Axe Talisman, Shard of Alexander |
Notes
All Great Hammers
The table below lists all Great Hammers in Elden Ring.
| Name | Image | Physical | Magic | Fire | Light | Holy | Crit. Boost | Weight | Str. | Dex. | Int. | Fai. | Arc. | Sell Price | Skill |
|---|---|---|---|---|---|---|---|---|---|---|---|---|---|---|---|
| Battle Hammer | 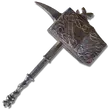
|
131 68 |
0 36 |
0 36 |
0 36 |
0 36 |
100 44 |
10 | C 26 |
E 8 |
0 | 0 | 0 | 200 | Braggart's Roar |
| Beastclaw Greathammer | 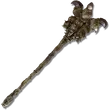
|
116 62 |
0 33 |
0 33 |
0 33 |
75 45 |
100 42 |
9 | D 20 |
D 10 |
0 | D 18 |
0 | 500 | Regal Beastclaw |
| Black Steel Greathammer | 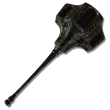
|
140 72 |
0 38 |
0 38 |
0 38 |
42 45 |
100 47 |
12.0 | C 25 |
E 11 |
0 | D 17 |
0 | 100 | Endure |
| Brick Hammer | 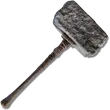
|
122 74 |
0 40 |
0 40 |
0 40 |
0 40 |
100 48 |
12.5 | B 31 |
0 | 0 | 0 | 0 | 100 | Barbaric Roar |
| Celebrant's Skull | 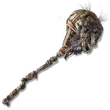
|
138 63 |
0 34 |
0 34 |
0 34 |
0 34 |
100 40 |
8.5 | D 18 |
D 12 |
0 | 0 | 0 | 100 | Barbaric Roar |
| Cranial Vessel Candlestand | 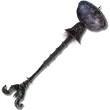
|
98 71 |
0 37 |
98 51 |
0 37 |
0 37 |
100 48 |
12.5 | D 26 |
E 8 |
0 | D 22 |
0 | 200 | Surge of Faith |
| Curved Great Club | 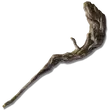
|
145 68 |
0 36 |
0 36 |
0 36 |
0 36 |
100 44 |
10 | D 24 |
D 10 |
0 | 0 | 0 | 100 | Barbaric Roar |
| Devourer's Scepter | 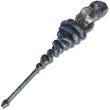
|
112 62 |
0 33 |
69 45 |
0 33 |
0 33 |
100 42 |
11.5 | D 24 |
D 20 |
0 | D 25 |
0 | 1000 | Devourer of Worlds |
| Envoy's Long Horn | 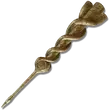
|
120 58.0 |
0 31.0 |
0 31.0 |
0 31.0 |
78 42.0 |
100 39 |
9.5 | D 23 |
D 11 |
0 | C 18 |
0 | 100 | Bubble Shower |
| Great Mace | 
|
134 71 |
0 38 |
0 38 |
0 38 |
0 38 |
100 46 |
11.5 | C 28 |
0 | 0 | 0 | 0 | 100 | Endure |
| Great Stars | 
|
135 68 |
0 36 |
0 36 |
0 36 |
0 36 |
100 44 |
10 | D 22 |
D 12 |
0 | 0 | 0 | 100 | Endure |
| Greathorn Hammer | 
|
134 65 |
0 35 |
0 35 |
0 35 |
0 35 |
100 42 |
10 | D 22 |
D 10 |
0 | 0 | 0 | 100 | Barbaric Roar |
| Large Club | 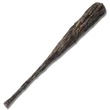
|
131 60 |
0 32 |
0 32 |
0 32 |
0 32 |
100 38 |
8.5 | C 22 |
0 | 0 | 0 | 0 | 100 | Barbaric Roar |
| Pickaxe | 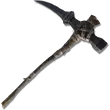
|
144 68 |
0 36 |
0 36 |
0 36 |
0 36 |
100 44 |
10 | D 22 |
D 10 |
0 | 0 | 0 | 100 | Endure |
| Rotten Battle Hammer | 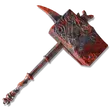
|
126 68 |
0 36 |
0 36 |
0 36 |
0 36 |
100 44 |
10 | C 26 |
E 8 |
0 | 0 | 0 | 200 | Braggart's Roar |
| Smithscript Greathammer | 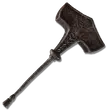
|
141 65 |
0 35 |
0 35 |
0 35 |
0 35 |
100 42 |
9.0 | D 20 |
E 10 |
E 11 |
E 11 |
0 | 100 | Endure |