
Doom Doom
| Doom Doom | |
|---|---|
 | |
| Class | Revolver |
| Type | Power |
| Ammo | Handgun Ammo |
| Tier | Iconic |
| Location | Northside |
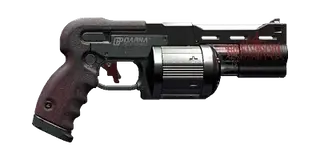
Doom Doom is Dum Dum's revolver, painted with a Maelstrom decal. It fires several rounds with every pull of the trigger and greatly raises the chance to dismember. In return, it has heavier recoil and a wider spread. Its description promises piles of flesh and an extensive clean-up afterwards. Getting it depends on a choice made at the very start of the story, and the wrong choice makes it impossible to get. Doom Doom is a mid-game drop from Dum Dum in the side job Second Conflict, at the Totentanz club in Northside.
Combat
Doom Doom fires a cluster of rounds per shot instead of one. Every trigger pull works like a short shotgun blast from a revolver. The dismemberment chance rises sharply, so limbs come off often. In return, recoil and bullet spread grow. The gun is far stronger up close than at range.
The best way to use it is like a small shotgun. V should get close, fire into the target's body and let the extra rounds do the work. Like every Power weapon, its rounds can ricochet off hard surfaces.
How to Get Doom Doom Guide
- Resolve The Pickup peacefully so that Dum Dum survives.
- Reach the side job Second Conflict.
- Enter the Totentanz to find Nancy.
- Fight Dum Dum, wait for him to draw Doom Doom, then defeat him.
- Loot Doom Doom from his body.
Doom Doom Map Location and Quest Guide
- Finish Holdin' On and try to call Nancy, which starts the side job Second Conflict.
- Settle The Pickup peacefully beforehand, because Dum Dum only waits at the Totentanz if he survived it.
- Go to the Totentanz in Northside and talk to the bouncer.
- Follow Dum Dum to Nancy and Royce.
- Start a fight with Dum Dum and give him a moment to draw his revolver.
- Kill Dum Dum and loot Doom Doom from his body.
Doom Doom map location:
Map credit by Map Genie.
Compatible Mods
7 scopes are compatible with Doom Doom.
| Name | Image | Effect |
|---|---|---|
| Add-Vantage | 
|
Adds zoom and effective range |
| CQO Kanone MINI Mk.72 | 
|
Adds zoom and effective range |
| Handyman | 
|
Adds zoom and effective range, more headshot crit chance at top tier |
| Hyakume | 
|
Adds zoom and effective range |
| Kanetsugu | 
|
Adds zoom, effective range and crit chance |
| OS-1 GimletEye | 
|
Adds zoom and effective range |
| Type 2067 | 
|
Adds zoom and effective range, lowers bullet spread |
Upgrades
Like every Iconic weapon, Doom Doom can be upgraded through the tiers in the Upgrades section of the crafting menu, using crafting components.
The table shows what each tier step of Doom Doom costs.
| Upgrade | Components | Requirement |
|---|---|---|
| Tier 1 to Tier 1+ | 75 Tier 1 components | - |
| Tier 1+ to Tier 2 | 40 components | - |
| Tier 2 to Tier 2+ | 75 Tier 2 components | - |
| Tier 2+ to Tier 3 | 40 components | - |
| Tier 3 to Tier 3+ | 75 Tier 3 components | - |
| Tier 3+ to Tier 4 | 40 components | - |
| Tier 4 to Tier 4+ | 75 Tier 4 components | - |
| Tier 4+ to Tier 5 | 40 components | - |
| Tier 5 to Tier 5+ | 75 Tier 5 components | - |
| Tier 5+ to Tier 5++ | 200 Tier 5 components | Phantom Liberty |
Character Builds
Doom Doom works best in a Cool build with revolver perks and some help against recoil. Focus removes the Stamina cost of aimed shots at full Stamina. Quick Draw speeds up the swap to the revolver and restores Stamina in combat. High Noon speeds up the next reload after a headshot kill while Deadeye is active. Rinse And Reload adds reload speed after a kill while aiming.
Recoil control matters most. Shock Absorber and Immovable Force both reduce recoil. Immovable Force also reduces bullet spread. The Ballistic Coprocessor raises ricochet chance and damage for Power weapons.
Select a Build
Berserk and Mantis Blades do the main work, leaping from enemy to enemy at close range. Doom Doom comes out between Berserks for targets the blades cannot reach. Its explosive rounds dismember enemies up close, and each dismemberment refills Adrenaline through Bloodlust.
Attributes: Body 20, Reflexes 20, Technical Ability 20, Intelligence 3, Cool 18.
The perks, cyberware and weapon mods for this build are listed below.
| Name | Image | Level | Effect |
|---|---|---|---|
| Painkiller | 
|
Body 4 | Slow Health regeneration in combat |
| Adrenaline Rush | 
|
Body 15 | More Health and the Adrenaline Rush mode |
| Calm Mind | 
|
Body 15 | Adrenaline lasts longer before it decays |
| Juggernaut | 
|
Body 15 | More speed and damage during Adrenaline Rush |
| Unstoppable Force | 
|
Body 15 | Immunity to knockdown and blinding during Adrenaline Rush |
| Pain To Gain | 
|
Body 20 | Kills recharge Health items during Adrenaline Rush |
| Focus | 
|
Cool 9 | Focus mode for free Stamina aimed shots |
| Head To Head | 
|
Cool 9 | Kills in Focus reset its duration |
| No Sweat | 
|
Cool 9 | Kills in Focus lower its Stamina cost |
| Rinse And Reload | 
|
Cool 9 | Faster reload after an aimed kill |
| California Reaper | 
|
Cool 15 | Stamina back after a headshot kill |
| Deadeye | Cool 15 | More headshot and weak spot damage | |
| High Noon | 
|
Cool 15 | Faster reload and slowed time after a headshot kill in Deadeye |
| Long Shot | 
|
Cool 15 | Full damage at any range during Deadeye |
| Quick Draw | 
|
Cool 15 | Faster swap to handguns and rifles with a Stamina boost |
| Dash | 
|
Reflexes 9 | Dash replaces the dodge |
| Air Dash | 
|
Reflexes 15 | Dash in midair |
| All Things Cyber | 
|
Technical Ability 9 | Stronger cyberware stats |
| Chrome Constitution | 
|
Technical Ability 9 | Less damage taken with full Skeleton and Integumentary slots |
| Ambidextrous | 
|
Technical Ability 15 | A second Hands cyberware slot |
| Built Different | 
|
Technical Ability 15 | Unlocks the Cellular Adapter cyberware |
| Cyborg | Technical Ability 15 | Shorter cyberware cooldowns with every slot filled | |
| Extended Warranty | 
|
Technical Ability 15 | Cyberware effects last longer |
| License To Chrome | 
|
Technical Ability 15 | Stronger cyberware, more armor and a Skeleton slot |
| Name | Image | Slot | Effect |
|---|---|---|---|
| Heal-On-Kill | 
|
Circulatory System | Health on each kill |
| Axolotl | 
|
Frontal Cortex | Kills cut all cyberware cooldowns |
| Mechatronic Core | 
|
Frontal Cortex | More damage against drones, robots and turrets |
| Self-ICE | 
|
Frontal Cortex | Blocks an enemy quickhack |
| Countershell | 
|
Integumentary System | Mitigation after a burst of damage |
| Reinforced Tendons | 
|
Legs | Double jump |
| Stabber | 
|
Nervous System | Crit chance with blades and throwables |
| NeoFiber | 
|
Nervous System | More mitigation chance and strength |
| Spring Joints | 
|
Skeleton | More mitigation strength |
Lore
Doom Doom is the Iconic variant of the Darra Polytechnic DR5 Nova and the signature weapon of Dum Dum, a senior Maelstrom member. V first meets Dum Dum in The Pickup, at the All Foods factory. If that deal goes peacefully, Dum Dum survives. Much later, the side job Second Conflict sends V into the Totentanz to get Nancy out. Dum Dum is there, and a fight with him is the only chance to take his gun.
Notes
- Killing Dum Dum during The Pickup loses Doom Doom.
- Herold Lowe sells Doom Doom only if V stayed on good terms with Maelstrom in The Pickup and missed the gun in Second Conflict.
Weapon Categories
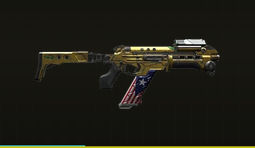
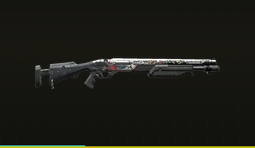
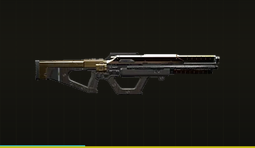
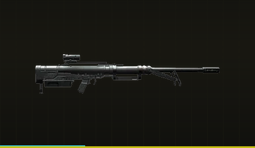
All Revolvers
Every revolver is listed below. The Iconic weapons come first, then the standard ones.
Iconic Revolvers
| Name | Image | Headshot | Armor Pen | Location |
|---|---|---|---|---|
| Amnesty | 
|
+200% | 25% | Badlands East |
| Archangel | 
|
+200% | Arroyo | |
| Bald Eagle | 
|
Dogtown | ||
| Comrade's Hammer | 
|
75% | Arroyo | |
| Crash | 
|
+200% | 25% | Badlands East |
| Doom Doom | 
|
Northside | ||
| Gris-Gris | 
|
|||
| Laika | 
|
+150% | 50% | Dogtown |
| Mancinella | 
|
+200% | 25% | Dogtown |
| Ol' Reliable | 
|
+200% | 25% | |
| Rosco | 
|
+150% | 25% | |
| Taigan | 
|
+175% | 50% | Dogtown |
Standard Revolvers
| Name | Image | Headshot | Armor Pen | Location |
|---|---|---|---|---|
| DR-12 Quasar | 
|
+175% | 50% | |
| DR-5 Nova | 
|
+200% | 25% | |
| Metel | 
|
+175% | 50% | |
| Overture | 
|
+200% | 25% | |
| RT-46 Burya | 
|
+175% | 50% |