
Fenrir
| Fenrir | |
|---|---|
 | |
| Class | Smg |
| Type | Power |
| Ammo | Handgun Ammo |
| Tier | Iconic |
| Headshot | +100% |
| Weight | 5 |
| Location | Northside |
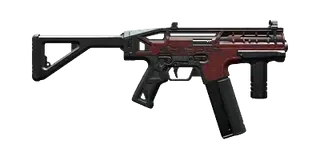
Fenrir is a Maelstrom-painted submachine gun whose rounds deal Electrical damage. Its hits can Shock enemies and have a chance to disable their cyberware. Its description claims that Maelstrom gangoons will wet themselves at the sight of it. It is an early, fast-firing SMG for a Reflexes build. Every burst has a chance to Shock enemies or disable their cyberware. Fenrir is an early find from the minor job Sacrum Profanum, also called Losing My Religion, in the Northside docks of Watson.
Combat
Fenrir fires the Saratoga's fast stream of rounds, but every round deals Electrical damage. Each hit has a chance to Shock the target, and some hits disable enemy cyberware. Against a heavily chromed gang like Maelstrom, a disabled implant can stop an enemy in the middle of a fight.
The high rate of fire gives those effects many chances to trigger in a single burst. The gun is at its best at close and mid range, where a long burst keeps hitting the same target.
How to Get Fenrir Guide
- Find the monk at the cargo bay in the Northside docks to start Sacrum Profanum.
- Go to the nearby Maelstrom warehouse surrounded by shipping containers.
- Get inside by the grate, over the containers or through the front gate.
- Deal with the Maelstromers and free the monk's brother.
- Take Fenrir from the table beside him.
Fenrir Map Location and Quest Guide
- Find the monk in distress at the Northside Docks in Watson to start the side job Sacrum Profanum.
- Agree to rescue his brother from Maelstrom.
- Head to the nearby warehouse among the shipping containers.
- Sneak in over the containers, or through another entrance, and try not to kill the Maelstromers, as the monk asks.
- Free the monk's brother inside the warehouse.
- Take Fenrir from the small table next to him.
Fenrir map location:
Map credit by Map Genie.
Compatible Mods
7 scopes and 9 muzzles are compatible with Fenrir.
| Name | Image | Effect |
|---|---|---|
| Add-Vantage | 
|
Adds zoom and effective range |
| CQO Kanone MINI Mk.72 | 
|
Adds zoom and effective range |
| Handyman | 
|
Adds zoom and effective range, more headshot crit chance at top tier |
| Hyakume | 
|
Adds zoom and effective range |
| Kanetsugu | 
|
Adds zoom, effective range and crit chance |
| OS-1 GimletEye | 
|
Adds zoom and effective range |
| Type 2067 | 
|
Adds zoom and effective range, lowers bullet spread |
| Name | Image | Effect |
|---|---|---|
| CS-1 Taipan | 
|
Silences shots and raises stealth damage, lowers base damage |
| RC-7 Aswang | 
|
Lowers recoil angle and direction, slightly lowers crit chance |
| RC-7 Ifrit | 
|
Lowers recoil, slightly lowers crit chance |
| RC-7 Strigoi | 
|
Lowers recoil |
| RC-7 Varkolak | 
|
Raises ricochet chance and ricochet angle |
| RC-7 Zaar | 
|
Lowers recoil angle, slightly lowers crit chance |
| TSX Tocororo | 
|
Raises stealth damage, lowers base damage |
| XC-10 Cetus | 
|
Raises stealth damage, lowers base damage |
| XC-10 Strix | 
|
Raises stealth damage, lowers base damage |
Upgrades
Like every Iconic weapon, Fenrir can be raised through the tiers in the Upgrades section of the crafting menu, paid for with crafting components.
The table shows what each tier step of Fenrir costs.
| Upgrade | Components | Requirement |
|---|---|---|
| Tier 1 to Tier 1+ | 75 Tier 1 components | - |
| Tier 1+ to Tier 2 | 40 components | - |
| Tier 2 to Tier 2+ | 75 Tier 2 components | - |
| Tier 2+ to Tier 3 | 40 components | - |
| Tier 3 to Tier 3+ | 75 Tier 3 components | - |
| Tier 3+ to Tier 4 | 40 components | - |
| Tier 4 to Tier 4+ | 75 Tier 4 components | - |
| Tier 4+ to Tier 5 | 40 components | - |
| Tier 5 to Tier 5+ | 75 Tier 5 components | - |
| Tier 5+ to Tier 5++ | 200 Tier 5 components | Phantom Liberty |
Character Builds
Fenrir works best with the SMG perks in the Reflexes tree. Mind Over Matter cuts recoil while aiming, and Tunnel Vision adds range and accuracy. Sharpshooter improves weapon control and gains a bonus stack with every hit. Shoot To Chill adds armor penetration for each stack. Submachine Fun reloads an SMG automatically on a swap and raises its fire rate afterwards. Spray And Pray lowers the Stamina cost of hip-firing.
For cyberware, the Kerenzikov slows time when V aims during a slide, dodge or Dash. Shock Absorber reduces recoil. Kiroshi Cockatrice Optics add crit chance, which adds to the electrical damage.
Select a Build
Attributes: Body 20, Reflexes 20, Technical Ability 20, Intelligence 3, Cool 18.
The perks, cyberware and weapon mods for this build are listed below.
| Name | Image | Level | Effect |
|---|---|---|---|
| Painkiller | 
|
Body 4 | Slow Health regeneration in combat |
| Adrenaline Rush | 
|
Body 15 | More Health and the Adrenaline Rush mode |
| Calm Mind | 
|
Body 15 | Adrenaline lasts longer before it decays |
| Juggernaut | 
|
Body 15 | More speed and damage during Adrenaline Rush |
| Mind Over Matter | 
|
Reflexes 9 | Less recoil while aiming |
| Ready, Rested, Reloaded | 
|
Reflexes 9 | Cheaper rifle and SMG fire and faster reloads |
| Spice Of Life | 
|
Reflexes 9 | Faster swap and tighter spread after a swap |
| Tunnel Vision | 
|
Reflexes 9 | More range and accuracy |
| Dash | 
|
Reflexes 9 | Dash replaces the dodge |
| Gundancer | 
|
Reflexes 15 | Full speed while aiming and shooting while vaulting |
| Sharpshooter | 
|
Reflexes 15 | Faster aim and Stamina stacks on hits |
| Air Dash | 
|
Reflexes 15 | Dash in midair |
| Tailwind | 
|
Reflexes 20 | Stamina from air dashes and double jumps |
| All Things Cyber | 
|
Technical Ability 9 | Stronger cyberware stats |
| Ambidextrous | 
|
Technical Ability 15 | A second Hands cyberware slot |
| Extended Warranty | 
|
Technical Ability 15 | Cyberware effects last longer |
| License To Chrome | 
|
Technical Ability 15 | Stronger cyberware, more armor and a Skeleton slot |
| Name | Image | Slot | Effect |
|---|---|---|---|
| Thermal Gorilla Arms | 
|
Arms | Fists that set enemies on fire |
| Biomonitor | 
|
Circulatory System | Uses a Health item when Health runs low |
| Blood Pump | 
|
Circulatory System | A Health item that heals over time |
| Behavioral Imprint-Synced Faceplate | 
|
Face | A disguise that escapes the police |
| Axolotl | 
|
Frontal Cortex | Kills cut all cyberware cooldowns |
| Mechatronic Core | 
|
Frontal Cortex | More damage against drones, robots and turrets |
| Immovable Force | 
|
Hands | Less recoil and tighter spread |
| Handle Wrap | 
|
Hands | Crit chance for throwable weapons |
| Reinforced Tendons | 
|
Legs | Double jump |
| Kerenzikov | 
|
Nervous System | Slows time when aiming during a slide or dodge |
| Chrome Compressor | 
|
Operating System | More cyberware capacity |
| Epimorphic Skeleton | 
|
Skeleton | More max Health |
| Universal Booster | 
|
Skeleton | Health items also give armor and Stamina |
| Name | Image | Effect |
|---|---|---|
| Kanetsugu | 
|
Handgun scope with crit chance and crit damage |
| RC-7 Varkolak | 
|
Muzzle brake with more ricochet chance |
Lore
Fenrir is the Iconic variant of the Militech M221 Saratoga, sprayed with Maelstrom colours. In Sacrum Profanum, V meets a monk at the Northside docks. Maelstrom holds his brother captive in a nearby warehouse. The monk asks V to rescue his brother, and to avoid killing the gang members if possible. The job opens once The Ride is done. Fenrir lies on a table next to the captive brother.
Notes
- Taking too long can fail the job, but Fenrir can still be collected from the warehouse.
Weapon Categories
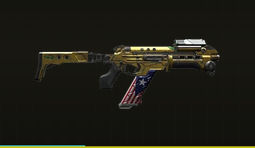
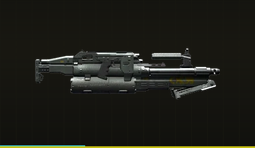
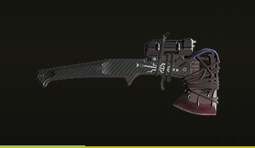
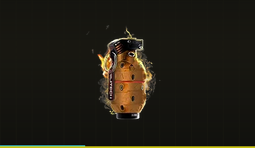
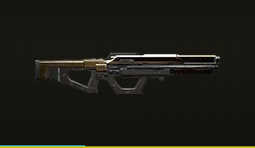
All SMGs
Every SMG is listed below. The Iconic weapons come first, then the standard ones.
Iconic SMGs
| Name | Image | Headshot | Armor Pen | Location |
|---|---|---|---|---|
| Buzzsaw | 
|
+100% | 25% | Northside |
| Chesapeake | 
|
|||
| Erebus | 
|
|||
| Fenrir | 
|
+100% | Northside | |
| Guillotine x-MOD2 | 
|
Dogtown | ||
| Pizdets | 
|
+85% | ||
| Problem Solver | 
|
+100% | Badlands East | |
| Prototype: Shingen Mark V | 
|
+50% | Arroyo | |
| Raiju | 
|
West Wind Estate | ||
| Yinglong | 
|
+50% | Wellsprings |
Standard SMGs
| Name | Image | Headshot | Armor Pen | Location |
|---|---|---|---|---|
| DS1 Pulsar | 
|
+100% | ||
| G-58 Dian | 
|
+50% | ||
| Guillotine | 
|
+100% | ||
| HA-7 Warden | 
|
+50% | ||
| M221 Saratoga | 
|
+100% | ||
| Senkoh LX | 
|
+100% | Arroyo | |
| Shigure | 
|
+100% | ||
| TKI-20 Shingen | 
|
+50% |